How to use VIA - the quickest start!
Thank you for choosing VIA app to track your journeys!
Please use shortcuts below to quickly find specific topic.
This application is overall simple to use; it will keep you data
stored locally on your device and will not care whether it runs or not;
whenever you quit the app and come back to it, your situation will be
just the same as when you left. So no worries about saving, loading etc.
Furthermore, if you get your online account*, the app will (if running)
synchronise your data changes with VIA online service whenever Internet
connection becomes available and you will be able to go to
VIA service site to browse your so far recorded and synchronized travels.
Main screen
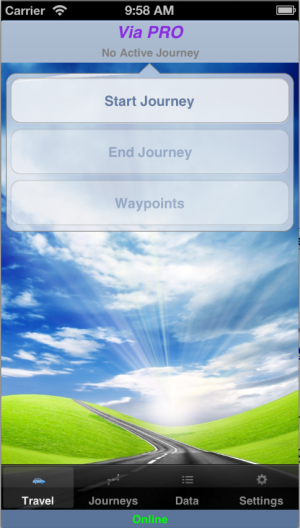
The first screen will offer four pages:

The first page, "Travel", offers you three main actions regarding
journeys. You can start a journey, add eventual waypoints which you like
to record during your journey, or end a journey.
Browse and edit your recorded journeys (including actual one) on "Journeys" page.
Manage your additional data on "Data" page.
Edit application settings on "Settings" page.
Starting a journey
To start a journey, tap "Start Journey" button on the main screen.
A mask will appear asking you about data related to your journey.
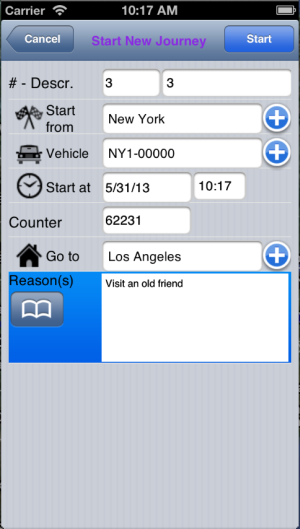
Enter journey number (numeric) into the first field; this number
is automatically increased by one each time you start the journey.
VIA also uses it to synchronize data with online service*. You can change it
as you like, for example if you like to start from number 12000, but you
can not use the same number twice, because it would then OVERWRITE
data under same number in online database*. The best practice is,
to set starting number (if you don't like #1) and let the app manage
following journey numbers.
Unlike the first number, the second one is "descriptive" and can be changed
as desired; the App will initially set it to be the same as journey number.
Data like starting location, vehicle (usually registration number of
the vehicle - car, motorbike, etc, but can also be any descriptive
name or mark you commonly use), destination and reason are
remembered when used first time so every time you start a new journey,
previously entered values will be shown and available to choose from.
Set start date and time and enter your car counter value because that value
is used to calculate number of kilometers/miles driven.
Use combos to choose from within previously used data wherever
you note "Add Item" button -  beside. Use Add Item button to add new entry immediately.
Use Catalogue/Browse button -  to choose from previously remembered
entries which can not be selected using standard combo control (such as reasons
which can contain larger amount of text).
When you start a new journey, your ending location and
counter value
from previously completed journey will be offered as new starting location
and counter value to speed up data entry.
Tap "Start" button to start the journey.
Now main screen tells us that the journey is ongoing and allows us to
perform other operations:
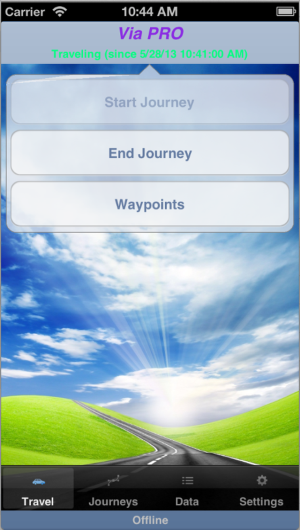
The journey will be treated as "active" all until manually "ended",
no matter how many times you close and reopen the app.
Adding waypoint(s)
Every journey can have several waypoints you would wish to record,
especially if it is a longer one. At any moment while the journey is active
you can access "Waypoints" and add or remove waypoints (locations)
as needed.
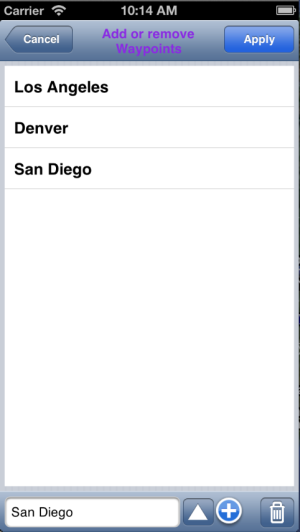
Choose location name from combo box at the bottom
and touch "Use Item" button -  to add waypoint to the list.
Select one waypoint and tap "Trash"  button to remove it from the list.
Finish editing waypoint touching "Apply" to save changes or "Cancel" to
discard changes.
Note that complete final relation of the whole journey will consist of
starting location, waypoints and ending location.
Browsing recorded journeys
To browse recorded journeys including eventual active one, choose
"Journeys" page from app's main screen. You will see a scroll view of
all yourneys stored in device's memory, organized in pages:
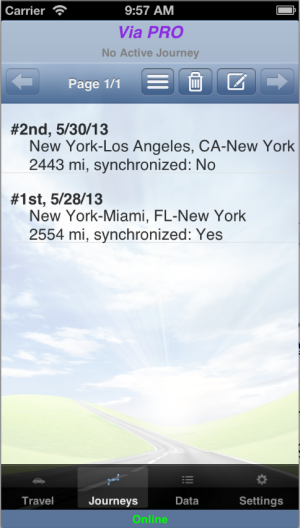
Journeys are sorted from newest to oldest. Navigate through pages
using appropriate next and
previous buttons on the toolbar.
Active journey will have mark "(in progress)" in the list.
Each journey has the mark "Synchronized"*
if it has already been synchronized with VIA
online service.
Select one or more journeys and press trash button to
delete them.
Data that are synchronized with web service can be deleted on the device
but will still remain on VIA server under your account. Thus, deleting older
journeys which are already synchronized helps you to save some device's memory.
To access journey data online* directly on your device, tap 
button and the application will open VIA Online Service page in your device's browser.
You can edit specific journey by selecting it in the grid and clicking  button.
A mask will appear, where you can change data about the journey.
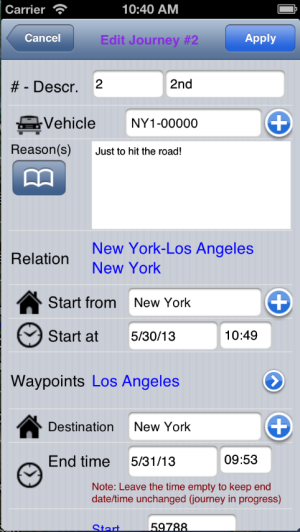
Remember that changed data need to be re-synchronized* with online service
(that happens automatically when VIA gets next opportunity to come online).
Tapping "Apply" will save your changes.
Ending a journey
When you are ready to end your journey, tap "End" button on main screen.
"End journey" mask appears. Correct ending location (if different from starting
location, which is offered automatically), time of return (if different from
current
time) and counter value to have appropriate number of kilometers/miles calculated.
You can also enter short description of the journey into "Notes" and add
eventual additional costs.
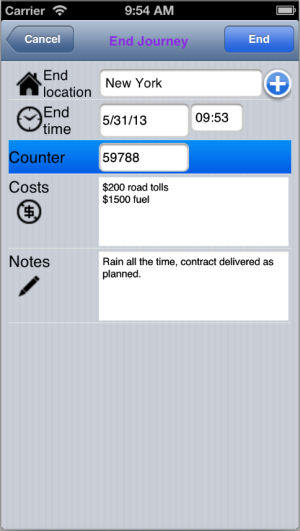
Tap "End journey" button and your journey will be complete. After that,
the application allows you to start a new journey.
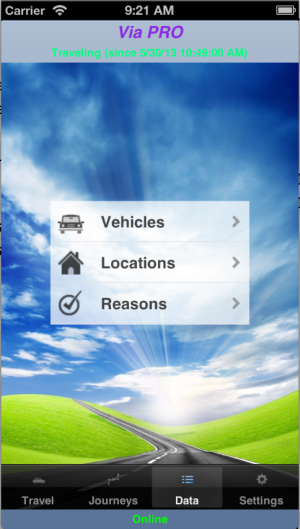
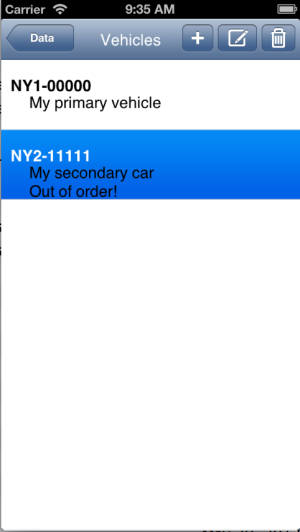
Data
On this page you can access additional data you created either
manually, or dynamically while you managed your journeys.
Touch a menu entry to review any of available categories:
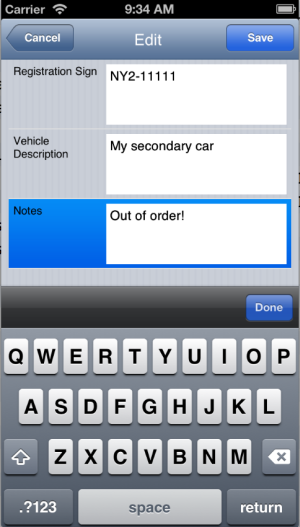
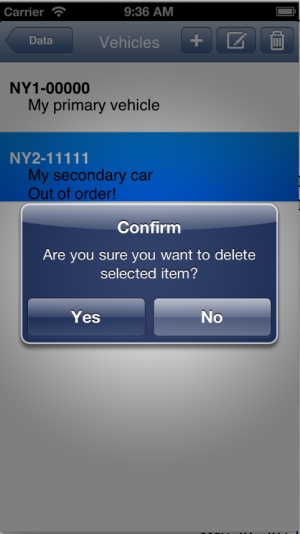
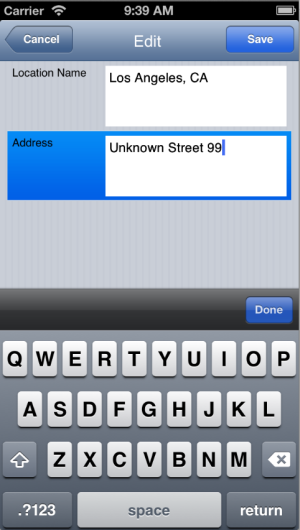
Using the toolbar in each category you may add,
edit or delete
entries. Touch an entry to select and work with it:
- use  button to add new entry.
- use button to edit marked entry.
- use button to delete an entry.
Select one more entries to delete them at once.
Deleting entries does not remove them from your journeys' data!
Journey locations, vehicles and reasons remain as entered.
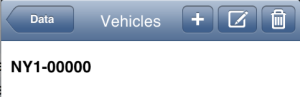
Vehicles
Use this option from main menu to see which vehicles you have used
so far in your journeys:
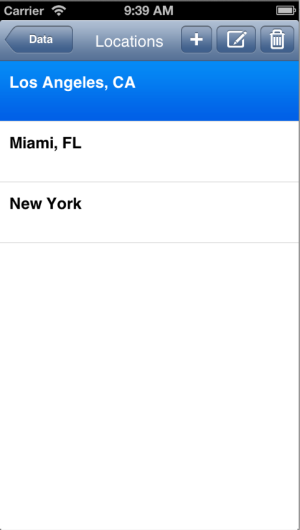
Locations
Use this option from main menu to see which locations
you have visited
and entered
so far:
Reasons
Use this option from main menu to see which reasons for yourney
you have used so far (reasons are added to this list whenever
a new one is entered when starting or editing a journey):

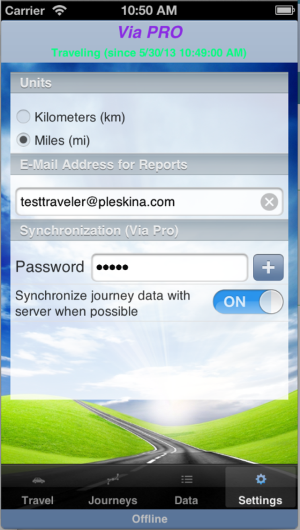
Settings
On "Settings" page you can determine if your journey distances are shown as
MILES (mi) or KILOMETERS (km). This settings can be changed at any time but
actual numbers recorded will NOT change.
You can also set username and password used in interaction with VIA
online service.
Using online service*
To synchronize your data with VIA online service and to be able to browse
them online, you must have an active VIA user account. To retrieve your account
contact VIA team as described in Online Account section.
Once you have your username and password, go to "Settings" screen and enter
username and password.
Activate the switch regarding data synchronization with server if you like VIA
to do the synchronization with online service each time when connection is
available and there is non-synchronised data. Remember that only finished
journeys are synchronized!
* Functionality available in PRO version only.